
Understanding the pf940v2 Jig
What is the pf940v2 Jig?
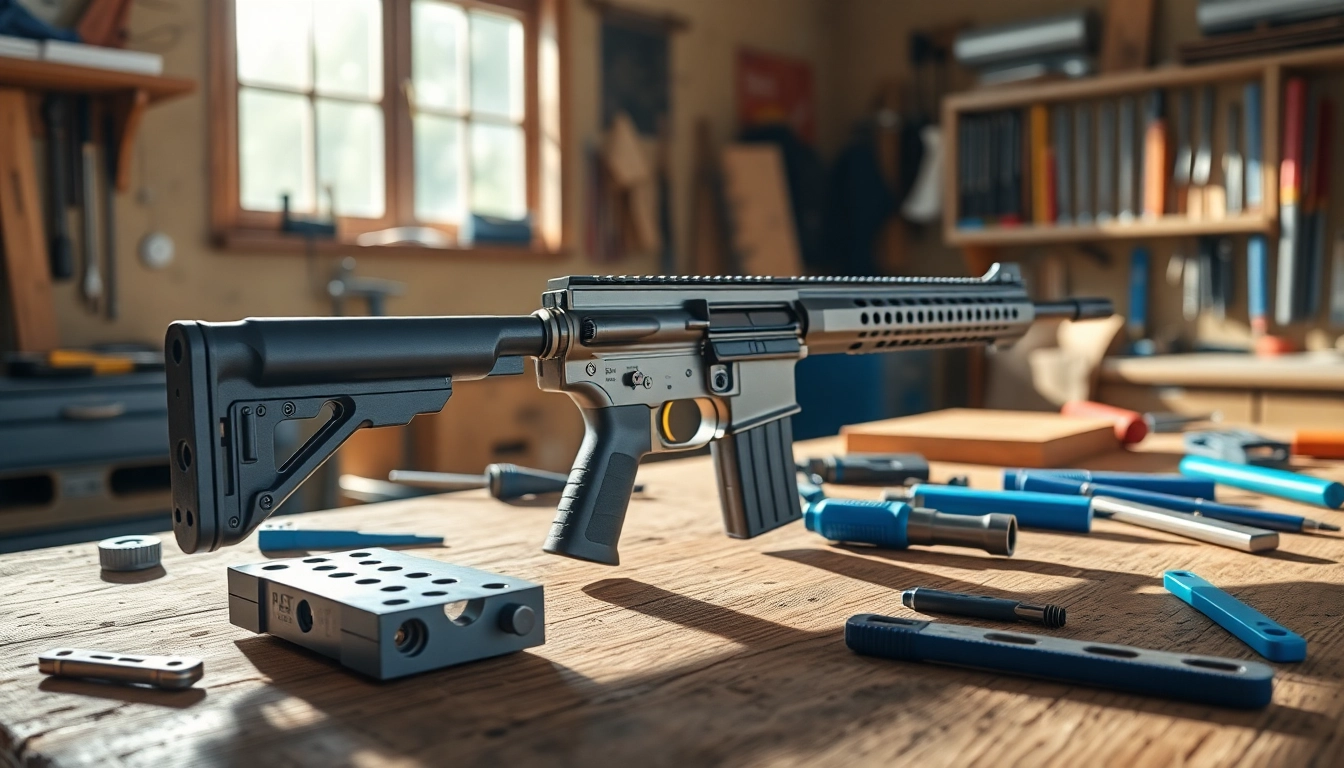
The pf940v2 jig is a crucial tool in the realm of firearm assembly, particularly for completing an 80% lower receiver. This jig is designed to simplify the process of milling an unfinished frame for Glock-style pistols. By providing precise alignment and support, it enables enthusiasts and builders to produce a functional firearm safely and accurately without the need for advanced machining experience.
Key Features and Benefits
The pf940v2 jig boasts several features that make it a standout choice for both novice and experienced builders. Firstly, it includes adjustable components to fit various frame sizes and maintain alignment during milling. Secondly, the jig is constructed from durable materials that withstand repeated use without wear. Additionally, it incorporates clear instructional guidance, minimizing the learning curve and reducing the likelihood of mistakes. Ultimately, these features culminate in a significant benefit: enhanced accuracy, leading to a successful and reliable firearm build.
Applications in Firearm Assembly
The applications of the pf940v2 jig extend beyond merely milling a lower receiver. It is also employed in custom builds, where users might want to integrate unique features or modifications. Additionally, this jig can be an educational tool for new builders, providing hands-on experience with firearms assembly. Whether for personal use or educational purposes, the pf940v2 jig plays a vital role in empowering users to engage rediculously in firearm craftsmanship.
Choosing the Right Materials for Use
Essential Components for Optimal Performance
To achieve the best outcomes when using the pf940v2 jig, selecting the right materials for your build is essential. The primary components include the frame material, which typically consists of polymer or aluminum, based on your preferences. Additionally, drilling tools made of high-speed steel or carbide are recommended for their durability and precision. Coupling high-quality materials with the pf940v2 jig enhances overall performance, resulting in accurate and functional firearm components.
Recommended Material Types for Durability
For optimal durability, users should consider using reinforced polymer frames for their builds. Reinforced polymers offer excellent strength-to-weight ratios while reducing the overall weight of the assembled firearm. When opting for aluminum, ensure that it meets aerospace-grade standards for maximum reliability. By prioritizing high-quality materials, builders will ultimately enhance their firearm’s performance, longevity, and reliability during operation.
How Material Choices Affect Assembly
The choice of materials significantly impacts the assembly process and the final product’s quality. Stiffer materials offer better rigidity and precision during milling, which is necessary for fit and finish. Conversely, softer materials may ease the initial assembly but can lead to premature wear or deformation. Understanding these dynamics allows builders to make informed choices that enhance the overall assembly experience and firearm performance.
Best Practices for Using the pf940v2 Jig
Step-by-Step Assembly Guide
To ensure a successful assembly using the pf940v2 jig, follow these time-tested steps:
- Gather all necessary tools, including the pf940v2 jig, drill, drill bits, and a milling machine.
- Prepare the work area to maintain cleanliness and organization, ensuring easy access to tools.
- Secure the unfinished lower receiver in the jig, following the manufacturer’s alignment instructions to guarantee proper positioning.
- Begin drilling pilot holes as specified in the instructions, ensuring to proceed slowly to maintain accuracy.
- Once pilot holes are complete, use the appropriate drill bits to finish the milling process, checking against the provided templates.
- After machining, remove the lower receiver and inspect for uniformity and structural integrity.
Common Mistakes and How to Avoid Them
Common pitfalls include improper alignment, insufficient cleaning of components, and using low-quality drill bits. Avoiding these mistakes requires careful preparation and attention to detail. Always double-check your setup before starting the milling process and ensure that all tools are in good condition. Furthermore, practicing on scrap material can enhance your skills and confidence, reducing errors during the actual assembly.
Enhancing Accuracy and Efficiency
To enhance both accuracy and efficiency, consider employing specialized tools such as digital calipers and laser sights during the milling process. Maintaining a consistent drilling speed and pressure will also result in cleaner cuts and better fitting components. Utilizing measuring devices ensures that all parts are dimensionally compliant, which optimizes firearm performance.
Frequently Asked Questions About the pf940v2 Jig
How do I maintain my pf940v2 jig?
Maintaining your pf940v2 jig involves regular cleaning after each use. Ensure no debris remains in the jig’s components, and check for any signs of wear to ensure optimal performance during future assemblies.
Can I use alternatives to the pf940v2 jig?
While alternatives exist, using the pf940v2 jig provides specific design features that enhance precision and simplify the assembly process. Alternatives may not offer the same level of accuracy or ease of use.
What accessories work best with the pf940v2 jig?
Recommended accessories include high-quality drill bits, a drill press for consistent drilling depth, and clamps to secure the jig during use. These tools improve assembly accuracy and efficiency.
Performance Metrics and Improvement Techniques
Measuring Assembly Precision
To gauge the precision of your assembly, measure critical dimensions such as trigger pin holes, takedown pins, and overall symmetry of the lower receiver. Ensuring that these measurements fit within acceptable tolerances promotes both functionality and safety during firearm operation.
Analyzing Performance Results
After completing the assembly, analyze the performance of the assembled firearm by conducting function tests. These tests should include firing function checks and examining for any signs of wear. Gathering feedback can help identify areas for improvement in both technique and materials used.
Adapting Techniques for Better Outcomes
Adapting techniques based on observed performance results is crucial for continuous improvement. Invest in additional training or tutorials to expand your skill set. Additionally, engaging with the firearm assembly community can provide insights into best practices that can enhance the building experience.